
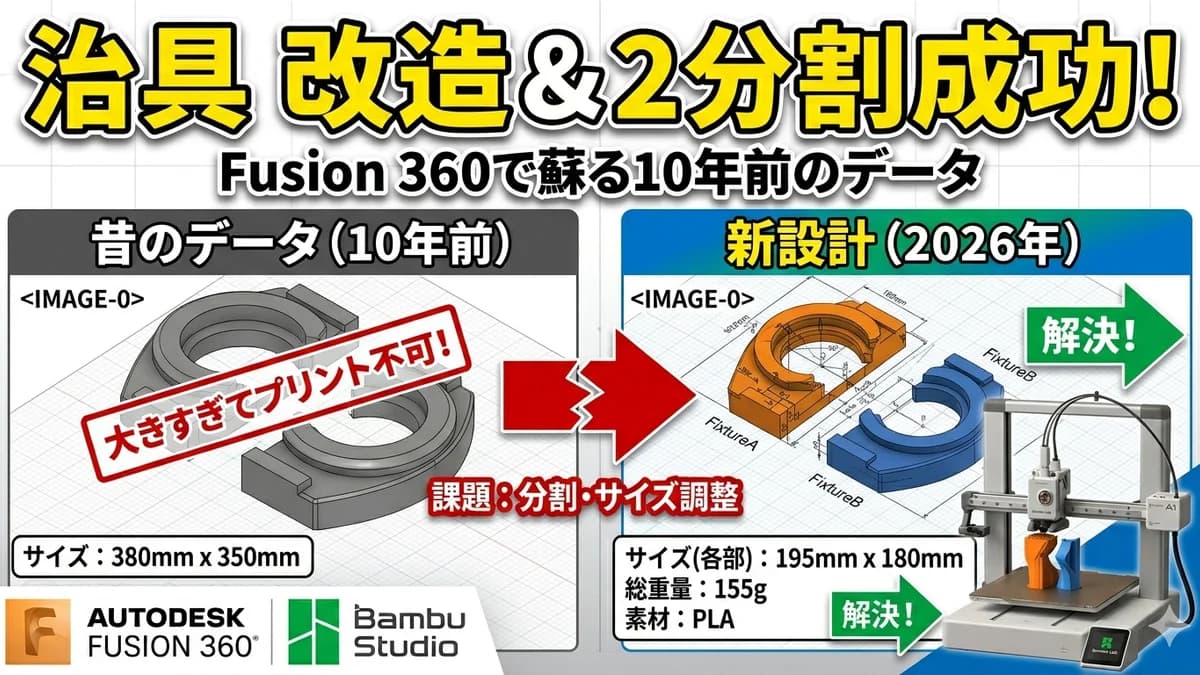

"So what do people actually make with 3D printers?" A must-read maker's development log that answers that question head-on has been published. The theme: reviving a "clear watch jig" that was made more than 10 years ago by hand-cutting PVC sheet, using a modern 3D printer. Old design data that had been sleeping at the back of a drawer is being called back into "active service" with today's equipment. You could call it opening a digital time capsule.
The tools used are Fusion 360 (Autodesk's 3D CAD) and Bambu Studio (a slicer for high-speed 3D printers). Filling the gap between ten years and the evolution of technology with painstaking adjustments in half-millimeter steps — we'll follow the whole process closely from a gadget lover's point of view.
What is a "jig" anyway? — The unsung hero of making things
A jig is an auxiliary tool that holds parts "firmly in the correct position" during machining or assembly. In DIY terms, it's something like a guide for drilling straight holes, or a template for cutting at the same angle over and over.
It may be unglamorous, but in settings where precision and mass production are everything, the quality of the jig greatly affects the final result. For craftspeople it's the "unsung hero behind the scenes." That's exactly why even the slightest misalignment can't be tolerated.
The star this time is a circular jig used for work around watches. With an outer diameter of about 374 mm and a width of about 381 mm, it's quite a large piece. Ten years ago it was apparently made by painstakingly cutting PVC sheet by hand, but being handmade, its precision had limits. The mission this time is to remake it with the precision of today's 3D printers.
Why "3D-printing it"
is such a win
The method ten years ago was completely manual: draw lines on PVC sheet and cut it out with a cutter and tools. That makes producing even one more identical piece a real chore, and the dimensions inevitably pick up the wobble of human hands.
With a 3D printer, though, once the digital data is in order you can print "as many as you want, at the same precision, with the push of a button." And if you want to change the position or size of a hole, you just rewrite a number in the data. There's no need to rebuild anything physically. When "the design = data," improving and duplicating become far more nimble — that's the biggest appeal of modern digital fabrication.
The first wall is "physical size"
— 381 mm won't fit
That said, the first thing to stand in the way is the physical wall of the printer's build size. Home-to-semi-pro 3D printers can typically build within a range (bed size) of around 25 cm at a time. A jig 381 mm wide won't fit in one go no matter how hard you try.
So the strategy chosen was "chop it right down the middle into left and right halves." Printing something large in parts and joining them afterward is a standard technique in the 3D printing world. But simply cutting it in half isn't enough. Whether the split parts mesh together cleanly depends on the design skill that follows. This is where the real work begins.
Opening "10-year-old data"
in Fusion 360
The redesign started by importing the 10-year-old DXF data (a standard file format for 2D CAD) into Fusion 360. This is exactly the moment of opening the time capsule.
The file itself opened without any problems, but naturally it wasn't made with today's 3D printing in mind. The 2D line drawing is rebuilt into a "shape with thickness" that can be printed as a solid. Even with the latest CAD packed with AI features and automation, this step of "translating old data into modern specs" remained the domain of craftsmanship requiring human judgment.
The half-millimeter battle — "exact size"
is a trap
This is the point that tickles a gadget lover's heart the most: deliberately not making dimensions "exact."
A 3D printer works by melting resin and stacking it one layer at a time. It shrinks slightly as it cools and hardens, and the resin coming out of the nozzle bulges a little, so the dimensions drift subtly from the design. If you build to the exact numbers on the drawing, you get the accident of fitted parts being "too tight to go in." To avoid this, craftspeople add "relief (clearance)" based on experience.
Here are the actual adjustments:
- Base width 336 mm → 336.5 mm (widened by half a millimeter)
- Outer diameter corrected from 374 mm → 377 mm
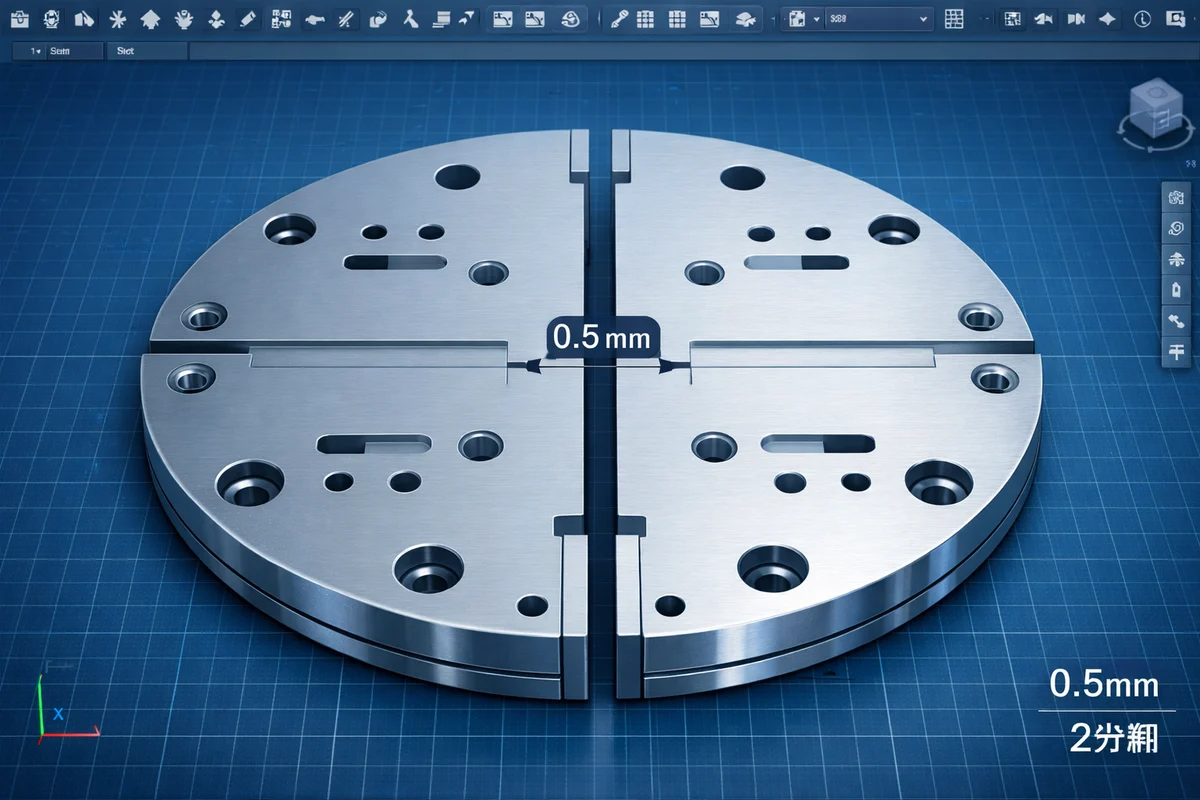
- A 0.5 mm clearance (gap) set at the central cut surface
The key is especially the 0.5 mm clearance at the seam of the two halves. Thanks to it, misalignment is absorbed when the left and right parts are joined, and they settle into place snugly without forcing. It's only 0.5 mm, but whether this "play" exists decides whether the finished product is usable. The delicacy of the world of numbers makes you groan in admiration.
The holes won't extrude! A classic 3D-data pitfall
Just when things seemed to be going smoothly, trouble struck: the holes (3 mm diameter) in the jig wouldn't "extrude" (turn into 3D) properly in the data.
In 3D CAD, if lines don't form a properly closed loop, they may not be recognized as a face and can't be made solid. The 10-year-old 2D data had spots like this lurking in it that "weren't cleanly closed." The fix was to redraw the reference lines and start over. It's unglamorous, but resolving these small snags one by one is the reality of 3D modeling.
Incidentally, the hole diameter was ultimately changed from 3 mm → 3.1 mm. This, too, counters the "exact size won't fit" problem mentioned earlier — sized slightly larger so screws and pins pass through smoothly. Five of these holes were placed at equal intervals to give it its function as a jig.
Slicing in Bambu Studio, then printing "just one side"
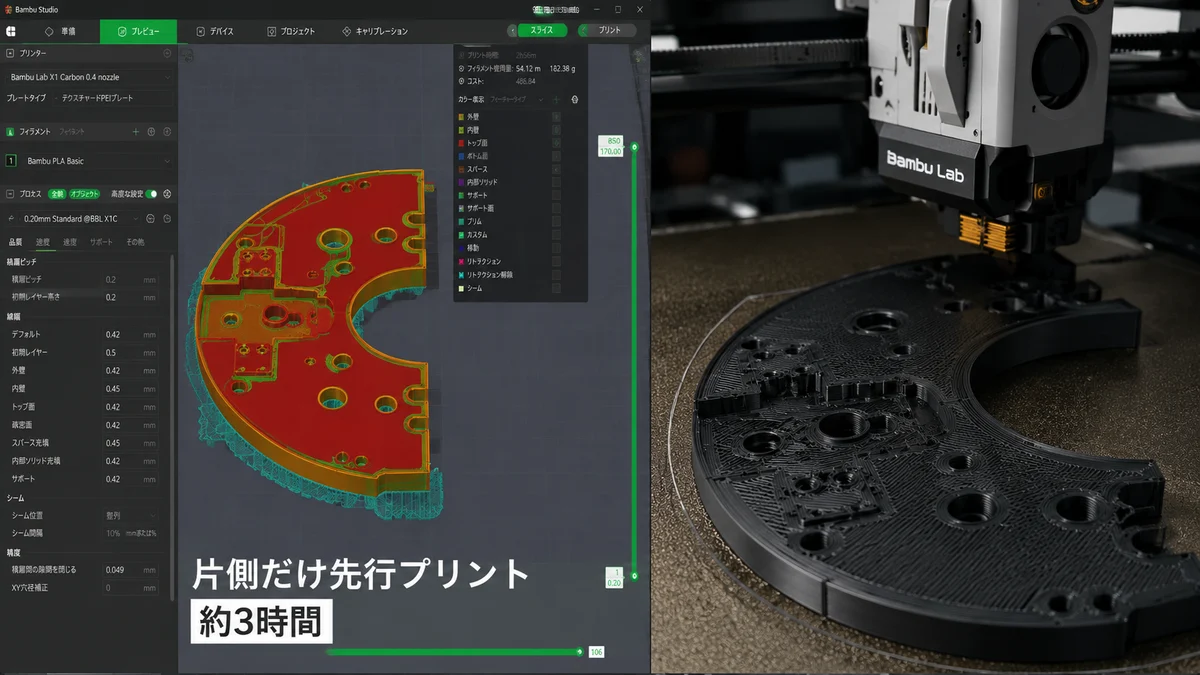
Once the design was settled, it was finally time to print. For the slicer (software that converts a 3D model into instructions for the printer), Bambu Studio, familiar from high-speed printers, was used. It converts the 3D model into "a stack of layers the printer can understand." The filament (material) was black PLA, a standard choice for its ease of use.
This is where the craftsman's risk management shines. Printing both sides at once would take about six hours. If it failed midway, or the clearance at the seam was off, all six hours would be wasted. So —
First print just one side (side B) ahead of time, to "test the waters" on size and clearance
That was the call. Side B alone takes about three hours to print and uses about 155 g of filament. Check the fit with that, and if there are no problems, print the other side. Anyone who deals with long prints will understand painfully well the importance of this caution — "don't go all in at once."
The thrill of "past assets × the latest equipment"
that hooks gadget fans
What makes this development log so moving is that it's more than just a work log. The very setup — data left behind by your past self 10 years ago coming back to life as an "even more precise tool" through modern technology — holds the ultimate romance.
With AI in CAD and faster printers, the barriers to making things have certainly come down. Even so, the half-millimeter judgment that anticipates shrinkage and the painstaking work of fixing unclosed lines are still supported by human hands — by a craftsman's experience. Only when the latest gadgets and human instinct turn together like two wheels is a "truly usable tool" born. Here, the fun of "trial and error," the real joy of making things, is condensed.
Why "black PLA"? — The reality of choosing materials
There are several types of 3D printer filament, the typical ones being PLA (polylactic acid), ABS, and PETG. PLA in particular warps little (the phenomenon of edges lifting during printing), has a mild smell, and doesn't need overly strict temperature control — the "honor student of ease of use."
At a "test print" stage like this, where you first want to check the shape and size, PLA is a sensible choice. Choosing black makes it easier to check scratches and dimensions and to judge the surface condition. Rather than going straight for a high-performance material, choosing the material that's "just right" for the purpose — that kind of pragmatism is also a judgment only an experienced maker would make.
Understand it in 3 minutes! A mini glossary of this article's gadget terms
Let's quickly review the keywords that appeared in the article.
- Fusion 360: Autodesk's 3D CAD software. The "command center of making things" that handles everything from design to analysis
- DXF: A standard file format for 2D CAD data. This time's "10-year-old legacy" was in this format
- Slicer: Software that converts a 3D model into "layer-by-layer instructions" the printer can read (Bambu Studio this time)
- Filament: The strand of material that acts as a 3D printer's "ink." This time, black PLA
- Clearance: A "gap" deliberately left when assembling parts. This time, 0.5 mm
- Extrude: A CAD operation that gives a 2D shape thickness to make it 3D
Once you've got these six words down, 3D-printing articles and videos should become much easier to follow.
Summary: the depth of making things, residing in a mere 0.5 mm
Looking back at the key points of this remake:
- The large 381 mm jig was split into left and right halves to reach a printable size
- Fine-tuning in half-millimeter steps in Fusion 360 (336→336.5 mm, 374→377 mm)
- A 0.5 mm clearance at the seam to counter misalignment
- Holes set at 3.1 mm × 5, with un-extrudable data fixed by redrawing the reference lines
- With Bambu Studio + black PLA, one side printed first (3 hours, about 155 g)
Looking only at the numbers, it's an accumulation of unglamorous fine adjustments, but each one carries the maker's determination: "I don't want it to fail," "I want it to fit properly." The moment a 10-year-old legacy comes back to life with modern equipment — how that one side turns out is expected to be known four hours later. The result will reportedly be shared in the next blog post or a YouTube video.
The more you love 3D printers and tinkering with gadgets, the more this "half-millimeter battle" should make you grin. At the back of your own drawer, too, there may be "10-year-old data" quietly sleeping, waiting to be revived someday.